Non-Upgradeable Plugins
Get Started with Non-Upgradeable Plugins
A Non-Upgradeable Plugin is a Plugin built on smart contracts that cannot be upgraded. This may or may not be what you want.
Some observations:
- Non-Upgradeable contracts are simpler to create, deploy, and manage.
- Instantiation is done via the
newkeyword or deployed via the minimal proxy pattern (ERC-1167) - The storage is contained within each version. So if your plugin is dependent on state information from previous versions, you won't have access to it directly in upcoming versions, since every version is a blank new state. If this is a requirement for your project, we recommend you deploy an Upgradeable Plugin.
Before moving on with the Guide, make sure you've read our documentation on Choosing the Best Type for Your Plugin to make sure you're selecting the right type of contract for your Plugin.
Building a Non-Upgradeble Plugin
We will build a plugin which returns "Hello world!" and the amount of times the function has been called.
1. Setup
- Make sure you have Node.js in your computer.
For Mac:
curl -o- https://raw.githubusercontent.com/nvm-sh/nvm/v0.39.1/install.sh | bash
nvm install 18
nvm use 18
nvm alias default 18
npm install npm --global
Or for Linux:
sudo apt update
sudo apt install curl git
curl -fsSL https://deb.nodesource.com/setup_18.x | sudo -E bash -
sudo apt-get install -y nodejs
Here's a tutorial on installing this if you haven't done so already.
- Next up, we want to create a Hardhat project in our terminal. This is the Solidity framework we'll use to get our project up and runing.
npm init
npm install --save-dev hardhat
npx hardhat
Here's a tutorial on how to answer the prompts if you need. For reference, I used the Typescript option for my Hardhat project.
- Install
@aragon/osxpackage
We want to install the Aragon OSx contract package within our project so we can access and import them throughout our project. This should speed up development significantly, although not it's not mandatory in order to build Aragon plugins.
npm i @aragon/osx
2. Building the plugin
- Create
GreeterPlugincontract
Plugins are composed of two key contracts:
- The
Plugincontract, containing the implementation logic for the Plugin, - The
PluginSetupcontract, containing the instructions needed to install or uninstall a Plugin into a DAO.
In this case, we will create the GreeterPlugin.sol contract containing the main logic for our plugin - aka returning "Hello world!" when calling on the greet() function. Keep in mind, that because we're importing from the Plugin base template in this case, we are able to tap into:
- the
auth(PERMISSION_ID)modifier, which checks whether the account calling on that function has the permission specified in theauthparameters. - the
dao()getter function, which returns the DAO instance to which the plugin permissions are bound.
First, in your terminal, create the GreeterPlugin.sol contract:
touch contracts/GreeterPlugin.sol
Then, inside of the file, add the functionality:
// SPDX-License-Identifier: AGPL-3.0-or-later
pragma solidity 0.8.21;

import {Plugin, IDAO} from '@aragon/osx/core/plugin/Plugin.sol';

contract GreeterPlugin is Plugin {
  // Permissions are what connects everything together. Addresses who have been granted the GREET_PERMISSION will be able to call on functions with the modifier `auth(GREET_PERMISSION_ID)`. These will be granted in the PluginSetup.sol contract up next.
  bytes32 public constant GREET_PERMISSION_ID = keccak256('GREET_PERMISSION');

  uint256 public amountOfTimes = 0;

  constructor(IDAO _dao) Plugin(_dao) {}

  function greet() external auth(GREET_PERMISSION_ID) returns (string memory greeter) {
    greeter = string.concat(
      'Hello world! This function has been called ',
      Strings.toString(amountOfTimes),
      ' times.'
    );
    amountOfTimes += 1;
  }

  function _amountOftimes() external view returns (uint256) {
    return amountOfTimes;
  }
}
- Create
GreeterPluginSetupcontract
Now that we're done with our GreeterPlugin implementation, we can get started with the installation instructions.
When we speak of installation, we're essentially referring to the the granting of the permissions needed so that the transactions can happen. In our GreeterPlugin contract, we defined a GREET_PERMISSION. Then, we used the auth(GREET_PERMISSION_ID) modifier on the greet(), defining that only those addresses with the GREET_PERMISSION will be able to call on the greet() function.
In the prepareInstallation() function here then, we will grant the GREET_PERMISSION to the DAO so it can call the function. In the prepareUninstallation() function, we do the opposite and revoke the GREET_PERMISSION.
// SPDX-License-Identifier: AGPL-3.0-or-later
pragma solidity 0.8.21;

import {PluginSetup} from '@aragon/osx/framework/plugin/setup/PluginSetup.sol';
import {PermissionLib} from '@aragon/osx/core/permission/PermissionLib.sol';
import './GreeterPlugin.sol';

contract GreeterPluginSetup is PluginSetup {
  function prepareInstallation(
    address _dao,
    bytes memory
  ) external returns (address plugin, PreparedSetupData memory preparedSetupData) {
    plugin = address(new GreeterPlugin(IDAO(_dao)));

    PermissionLib.MultiTargetPermission[]
      memory permissions = new PermissionLib.MultiTargetPermission[](1);

    permissions[0] = PermissionLib.MultiTargetPermission({
      operation: PermissionLib.Operation.Grant,
      where: plugin,
      who: _dao,
      condition: PermissionLib.NO_CONDITION,
      permissionId: keccak256('GREET_PERMISSION')
    });

    preparedSetupData.permissions = permissions;
  }

  function prepareUninstallation(
    address _dao,
    SetupPayload calldata _payload
  ) external pure returns (PermissionLib.MultiTargetPermission[] memory permissions) {
    permissions = new PermissionLib.MultiTargetPermission[](1);

    permissions[0] = PermissionLib.MultiTargetPermission({
      operation: PermissionLib.Operation.Revoke,
      where: _payload.plugin,
      who: _dao,
      condition: PermissionLib.NO_CONDITION,
      permissionId: keccak256('GREET_PERMISSION')
    });
  }

  function implementation() external view returns (address) {}
}
3. Deploy your Plugin
a) Hardhat's local environment
- In the Terminal, we first want to create a deployment script file:
touch scripts/deploy.ts
- Now, let's add the deployment script in to the
deploy.tsfile
import { ethers } from "hardhat";

async function main() {
  const [deployer] = await ethers.getSigners();

  console.log("Deploying contracts with the account:", deployer.address);
  console.log("Account balance:", (await deployer.getBalance()).toString());

  const getGreeterSetup = await ethers.getContractFactory("GreeterPluginSetup");
  const GreeterSetup = await getGreeterSetup.deploy();

  await GreeterSetup.deployed();

  console.log("GreeterSetup address:", GreeterSetup.address);
}

// We recommend this pattern to be able to use async/await everywhere
// and properly handle errors.
main().catch((error) => {
  console.error(error);
  process.exitCode = 1;
});
- Let's deploy!
In your terminal, run:
npx hardhat run scripts/deploy.ts
b) Goerli testnet network or others
Now that we know the local deployment works, we will want to deploy our plugin to Goerli testnet so we can publish it in the Aragon OSx protocol to be accessed by DAOs.
- Firstly, let's set up the
hardhat.config.jswith Goerli environment attributes (or whichever network you'd like to deploy your plugin to).
import '@nomicfoundation/hardhat-toolbox';

// To find your Alchemy key, go to https://dashboard.alchemy.com/. Infura or any other provider would work here as well.
const goerliAlchemyKey = 'add-your-own-alchemy-key';
// To find a private key, go to your wallet of choice and export a private key. Remember this must be kept secret at all times.
const privateKeyGoerli = 'add-your-account-private-key';

module.exports = {
  defaultNetwork: 'hardhat',
  networks: {
    hardhat: {},
    goerli: {
      url: `https://eth-goerli.g.alchemy.com/v2/${goerliAlchemyKey}`,
      accounts: [privateKeyGoerli],
    },
  },
  solidity: {
    version: '0.8.17',
    settings: {
      optimizer: {
        enabled: true,
        runs: 200,
      },
    },
  },
  paths: {
    sources: './contracts',
    tests: './test',
    cache: './cache',
    artifacts: './artifacts',
  },
  mocha: {
    timeout: 40000,
  },
};
- Once we have the Goerli environment set up, run this command in your terminal to deploy the plugin:
npx hardhat run --network goerli scripts/deploy.ts
4. Publish the Plugin in Aragon OSx
Now that the plugin is deployed on Goerli, we can publish it into the Aragon OSx Protocol so any DAO can install it!
Publishing a plugin into Aragon OSx means creating a PluginRepo instance containing the plugin's first version. As developers can deploy more versions of the plugin moving forward, publishing a new version means adding a new PluginSetup contract into their plugin's PluginRepo contract. This is where all plugin versions will be stored and what Aragon's plugin installer will use to fetch the latestVersion and install it into DAO's.
You can publish the plugin into Aragon's protocol through a few different ways:
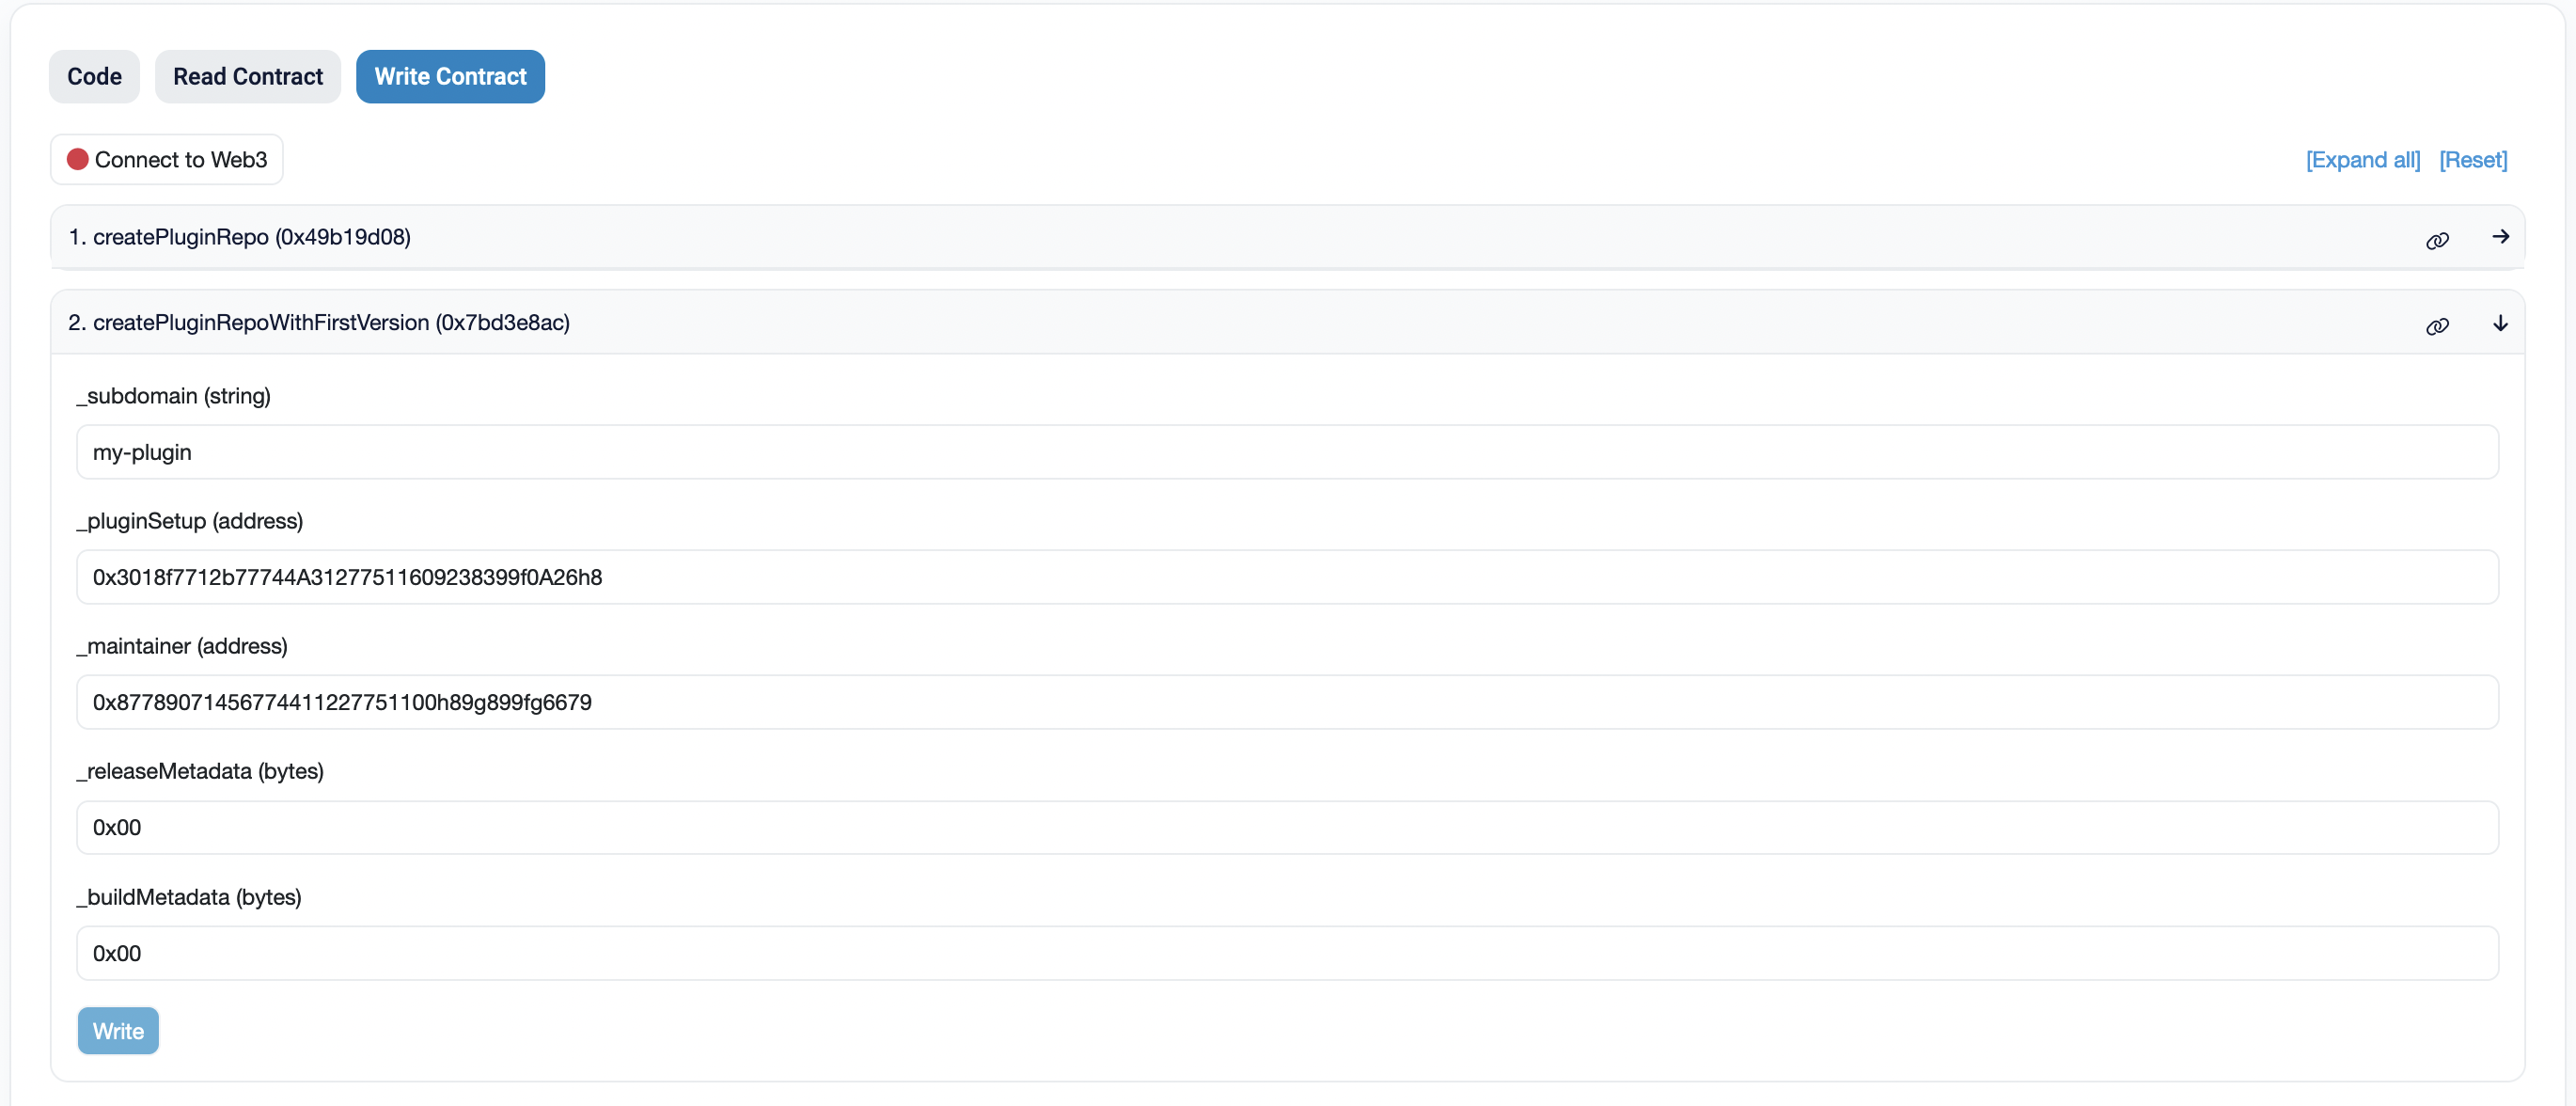
a) Etherscan
Go to the PluginFactory contract on Etherscan and deploy the first version of your plugin.
b) Publishing script
You can also publish your Plugin through using a publish script.
- Create the
publish.tsfile within yourscriptsfolder.
touch scripts/publish.ts
- Add this publishing script to the
publish.tsfile.
This will get the PluginRepoFactory contract and call on its createPluginRepoWithFirstVersion to create the plugin's PluginRepo instance, where plugin versions will be stored.
import {
  PluginRepoFactory__factory,
  PluginRepoRegistry__factory,
  PluginRepo__factory,
} from '@aragon/osx-ethers';
import {DeployFunction} from 'hardhat-deploy/types';
import {HardhatRuntimeEnvironment} from 'hardhat/types';

const func: DeployFunction = async function (hre: HardhatRuntimeEnvironment) {
  const {deployments, network} = hre;
  const [deployer] = await hre.ethers.getSigners();

  const pluginRepoFactoryAddr = '0x301868712b77744A3C0E5511609238399f0A2d4d';

  const pluginRepoFactory = PluginRepoFactory__factory.connect(pluginRepoFactoryAddr, deployer);

  const pluginName = 'greeter-plugin';
  const pluginSetupContractName = 'GreeterPluginSetup';

  const pluginSetupContract = await deployments.get(pluginSetupContractName);

  const tx = await pluginRepoFactory.createPluginRepoWithFirstVersion(
    pluginName,
    pluginSetupContract.address,
    deployer.address,
    '0x00', // releaseMetadata: the hex representation of the CID containing your plugin's metadata - so the description, name, author, any UI, etc
    '0x00' // buildMetadata: same as above but for each build, rather than release
  );

  console.log(
    `You can find the transaction address which published the ${pluginName} Plugin here: ${tx}`
  );
};

export default func;
In order to run the script and finalize the publishing, run this in your terminal:
npx hardhat run scripts/publish.ts
To publish new versions in the future,
Conclusion
Hope this tutorial is useful to get you started developing for Aragon! If you need any additional support or questions, feel free to hop into our Discord and ask away.
Excited to see what you build! 🔥
Up next, check out our guides on:
